
A secure toolbox won’t blow away
If you just want the step by step it is at the bottom of this page.
Ute Safe has been making and selling toolboxes for over 15 years. We have had a great opportunity to see not only our own boxes fitted onto ute trays, but also other suppliers boxes, sometimes this is a real eye opener.
“What is a good toolbox install and what are some of the pitfalls?”
A good install leaves the toolbox securely fitted to the tray with minimal modification to the box or tray and does not create a leak point into the box.
All in all the goal is pretty simple.
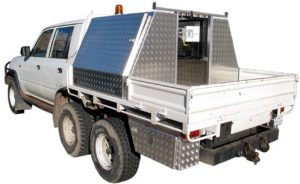
Let me provide some examples of the pitfalls. An under tray box is a very specific example, these must have the top of the box secured to the bottom of the ute tray. A bad way to mount these boxes is with two coach bolts fitted through the tray floor and into the top of the box. I have seen this type of installation a number of times and the pathway created from the hole in the floor of the tray and along the length of the bolt can allow a small stream of water to completely fill the box mounted under the tray.
 When the under tray box is constructed from thin gauge material, and not fitted with a spreader plate or adequate stiffening at the mount point, another problem is created. The material around the hole, particularly with a loaded box continually being subject to movement under the tray, will stretch, this stretching loosens the connection and can create a rattle, it is even possible for the connection to become so bad that the box breaks away.
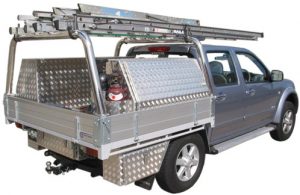
The possibility of leaks for boxes from the mount points, mounted on top of the tray are less than for boxes mounted under the tray. A box mounted on top is not continually pulling away from the tray. The main reason for boxes to leak on top of a tray is a result of the quality of the box. Weather protection in the box design is more relevant to keeping the water out of the box. Problems that create leaks are generally the result of poor design and construction, inferior material or the use of piano hinges and or pop rivets in construction.
Some tray/box connections that we would not recommend, have uses a small number of pop rivets or TEK screws to secure the box to the tray. Pop rivets, themselves are not a bad fastener, however the correct quantity and hole pattern arrangement is critical. It is simpler to give these a wide berth and stick with a bolted connection. Another novel approach we would not recommend is a bead of silicone or construction adhesive applied to the tray, and which the box has been allowed to set overnight on top of. This can actually create a secure fix. However the choice of adhesive is affected by environmental factors which may be specific to your particular use. It also poses major considerations due to maintenance, movement or replacement of a fitted box.
Handy hints for a secure toolbox
The simplest and the best choice is a bolted connection. The best choice for bolted connection is a zinc plated mild steel bolt and nut. Not stainless steel and not un-plated bolts. (Zinc plated steel have a coating of zinc which better protect the aluminium box and tray than a stainless steel bolt will. Stainless steel is a poor choice of material to mix with aluminium as this material encourages the aluminium it touches to give up electrons. i.e corrosion or “rust”)
If the box or the tray is made from light gauge aluminium, it usually pays to use a large load-spreader or washer on top or and below.
We recommend 4 x 10mm bolts to secure a box. A 10mm bolt is significantly bigger than what is required. However, without tensioning equipment, this size bolt can be tensioned without breaking the bolt or damaging thread, making it simpler to install with the usual home equipment. The 10mm hole required can also be drilled with the usual equipment available at home.
(4 x 6mm high tensile bolts are all that is generally required. It is important to ensure that these are high tensile and not mild steel and that a body washer to provide a surface area similar to the washer used with a 10mm bolt is used.)
Step by step for the secure toolbox way

Mark out your mount points
1: Having located the box in the place you are happy with, look under the tray and find suitable mount location points that are free of tray floor reinforcing ribs. Extending this line through to the outside of the tray, extend this line back into the box to be installed. The goal is to establish at each end of the box a line where it is safe to match drill through the box floor and tray top. Approximately 50mm from the front and the rear of the box intersect these lines to create 4 mount points.
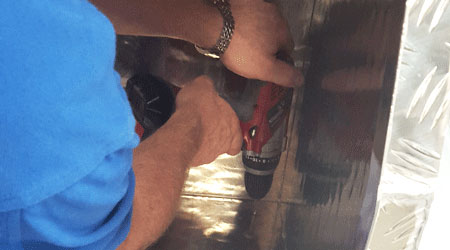
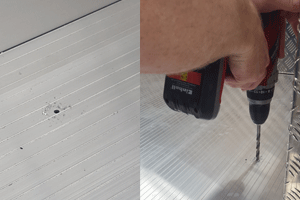
Drill out your pilot holes
2: With the box in position drill a pilot hole with a 4 or 4.5mm hole through one point at a time. For every hole that you drill, insert a 4mm screw or rivet into the hole to ensure that the box does not move as you continue to drill the remaining holes.
3: When all four pilot holes have been drilled, lie the box on its back or remove it completely and progressively open the pilot holes in the box to the final size required. Repeat this procedure with the holes in the tray and now clean/debur all holes and sweep up.
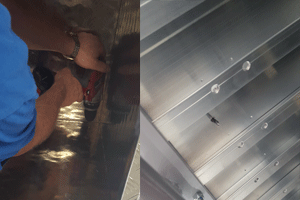
Open up the pilot holes
4: The box holes and the tray holes will align and now the bolt can be fitted. With a washer on both the bolt and nut side, feed the bolt from under the tray and up into the box. Tighten a nyloc nut on the inside of the box.
This will create a securely mounted box. For additional weather fastness – applying a sealant around the nut inside the box before final tightening will provide a weather seal. In most cases this is not required,

Secure the box with bolts
However if the vehicle tray does not easily drain and is prone to filling with water then this reservoir of water can be transported via capillary action along the screw thread and up into the box.
Here endeth the lesson for a secure toolbox on your ute.
Has anyone tried using a wooden tray to bolt toolboxes on if so please run me through how to do it the best way
Hi Ethan,
Attaching your toolbox to your wooden tray would work in a similar way as described in this article.
Thanks for these tips for securing a toolbox on a tray. I actually didn’t know that it could be good to have a large load-spreader if the tray is made from light gauge aluminum. It sounds like you should really know the materials in and on your car so you can determine what compatible materials there are.
is there any harm in placing a “thin strip of rubber” much like a shim, between bottom of toolbox and ute floor.i was thinking only a section of rubber about 50mm x 50mm x 2-3mm thick at each bolt hole
The rubber material in the rubber shim would not in itself create any harm, but I am not sure what your intent is in regard to the use of a shim. If you are worried about things rattling around in side your box, I would bolt the box securely to the tray and fit a rubber mat inside the box to reduce the transmission of sound from the contents bouncing around. The damping effect of a mat between the tray and box is less efficient, and really only harms the budget.
The only issue might be in the case of using a shim that is very thick, as a gap between the centre of the box and the top of the tray will be created, and this would over time under the weight of the contents create a convex base to the box. That would not of itself be a problem for a Ute Safe box, but if it was a poorly constructed box from elsewhere and leaked, then the water would now pool around the contents instead of running out through the boltholes.